Dynamic Load
Note
Support:Android / iOS / Windows
OSX platform note: VOIDAR_Unity_v1.0_Beta4 does not support running on OSX platform, but building iOS app works OK.
Part 1. Introduction
Dynamic Load Module, is dynamically add or delete the ImageTarget (Marker) and models in runtime.
Part 2. Reading Guidelines
This tutorial is mainly to introduce how to process in Unity environment.
We assume that readers have basic experience in app development and unity usage.
For more unity3d usage information, please visit the official website of unity3d documentation.
Part 3. Development Environment
You need to install and prepare your development environment as below before you start.
OS
- Windows 7 or higher
- OS X 10.10 or higher
Unity Version Support
| Unity3D Version | VOID AR SDK Full Features |
|---|---|
| 5.6.x | Support All Features |
| 2017.x | Support All Features |
| 2018.x | Support All Features |
| 2019.1.x | Support All Features |
| 2019.2.0 | Support All Features |
Note
Unity3D of this tutorial: Unity 2017.4.13
Unity3D Download: https://unity3d.com/cn/get-unity/download/archive
Part 4. Implementation process
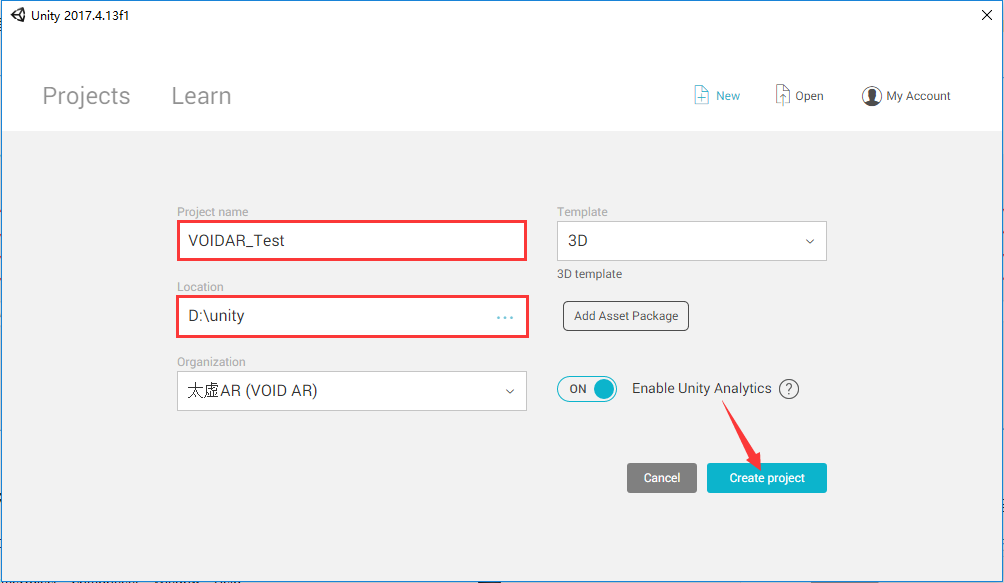
Step 1. Open new Unity project
Open Unity with new project. Fill the Project name with “VOIDAR_Test”, and select the location, and click [ Create project ].
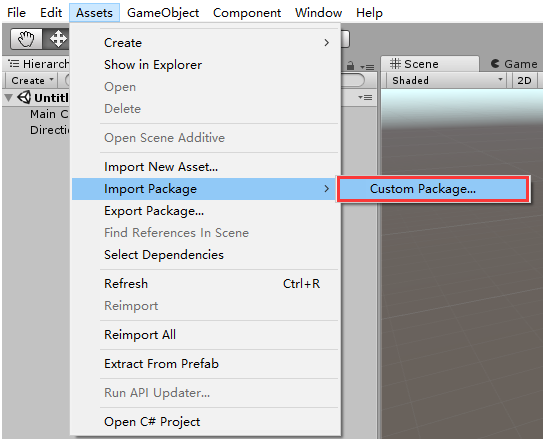
Step 2. Import VOID AR SDK
Select[ Assets ] -> [ Import Package ] -> [ Custom Package... ], import VOID AR SDK.
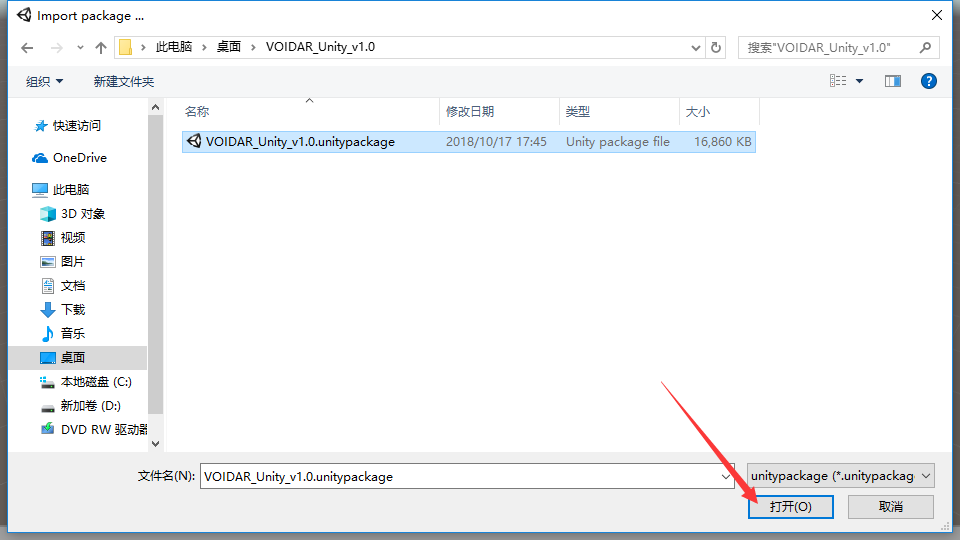
Select the downloaded SDK file (.unitypackage), and click [ Open ] button.
Click [ Import ] from the prompted window. It takes minutes during the import process.
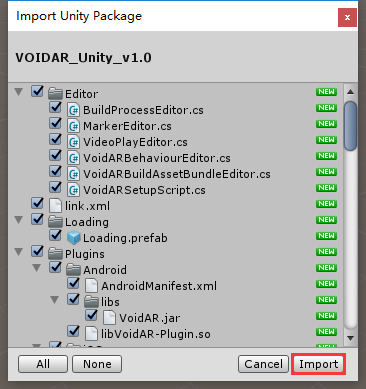
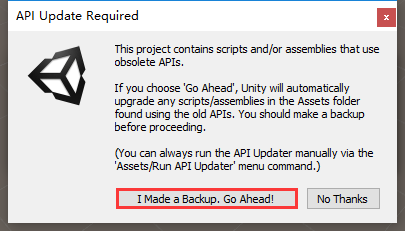
If there is a prompt window of “API Update Required” interface,please click [ I Made a Backup, Go Ahead! ].
Step 3. Delete Main Camera
Note
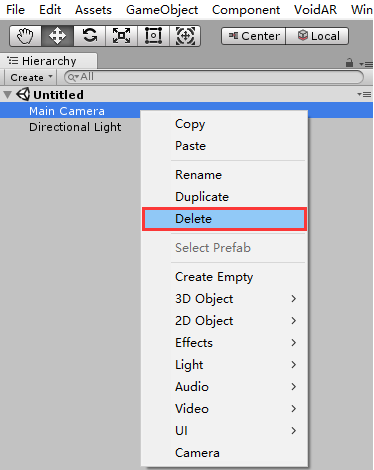
When you open the Unity3D, you will see the new scene in default. The new scene has two GameObjects: a "Main Camera" and a "Directional Light". We need to use the ARCamera from SDK, so please delete the default Camera.
Right click the "Main Camera” from the scene, and select [ Delete ].
Step 4. Drag the prefabs “ARCamera”
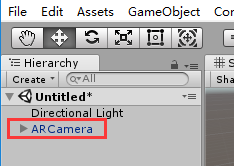
Expand the directory [ Assets ] -> [ VoidAR ] -> [ Prefabs ],
and drag the prefabs “
ARCamera” to the scene.

When you finish the process, it shows as below:
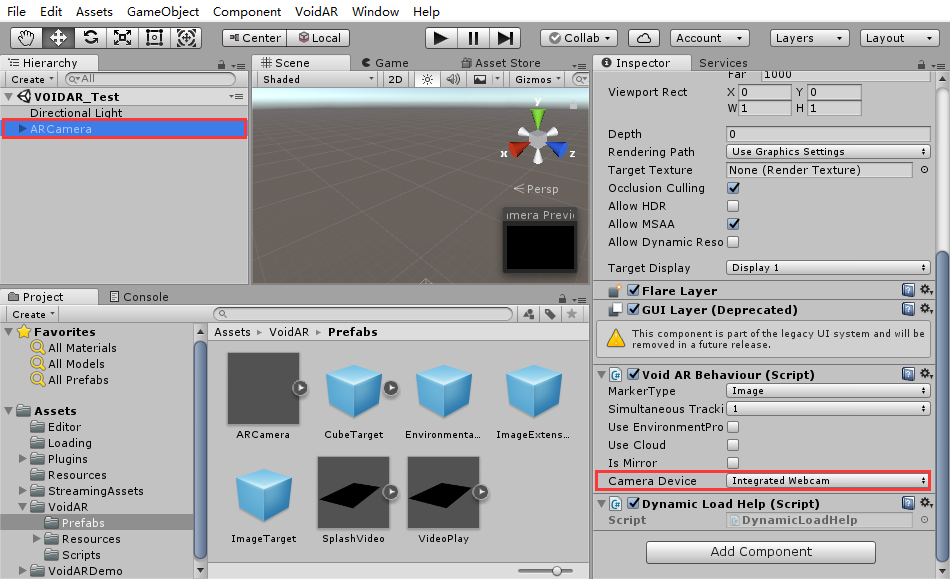
Step 5. ARCamera Setup
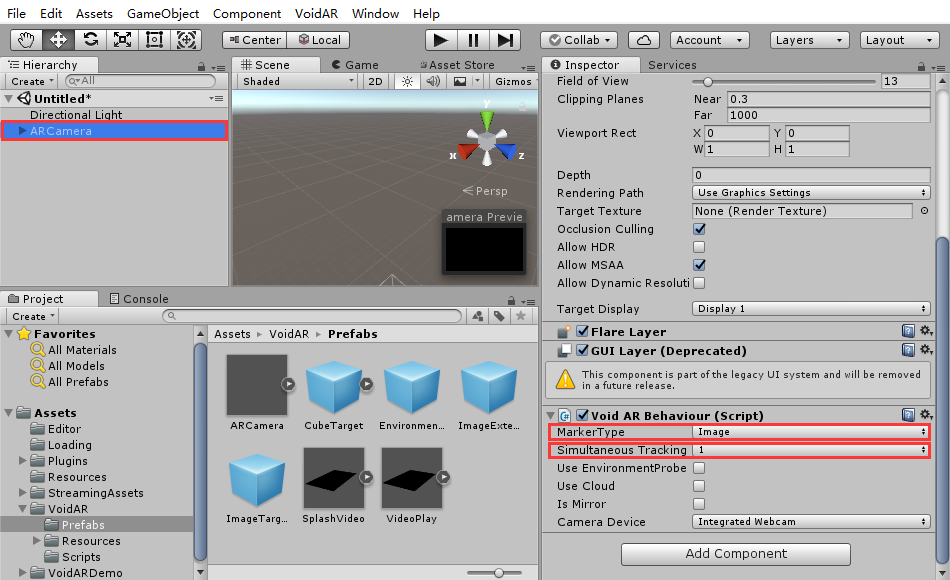
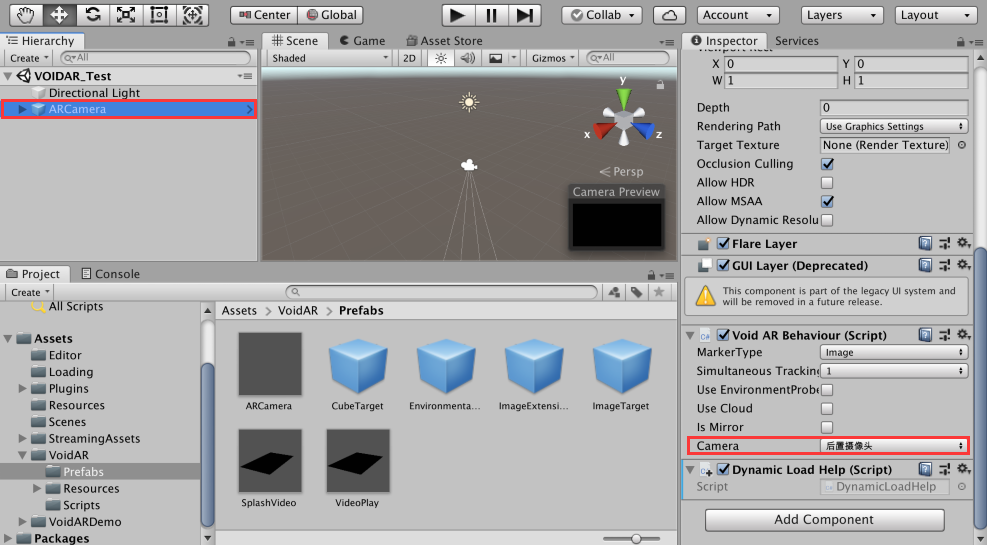
Select ARCamera, and look up in the “Inspector” area on the right side, setup “Void AR Behaviour (Script)” properties.
Set MarkerType= "Image", stands for image target recognitionSet Simultaneous Tracking= "1", representing the number of simultaneous tracking marker is 1
Step 6. Add Script
Select “ARCamera”, click [ Add Component ] to add “Dynamic Load Help” script component.
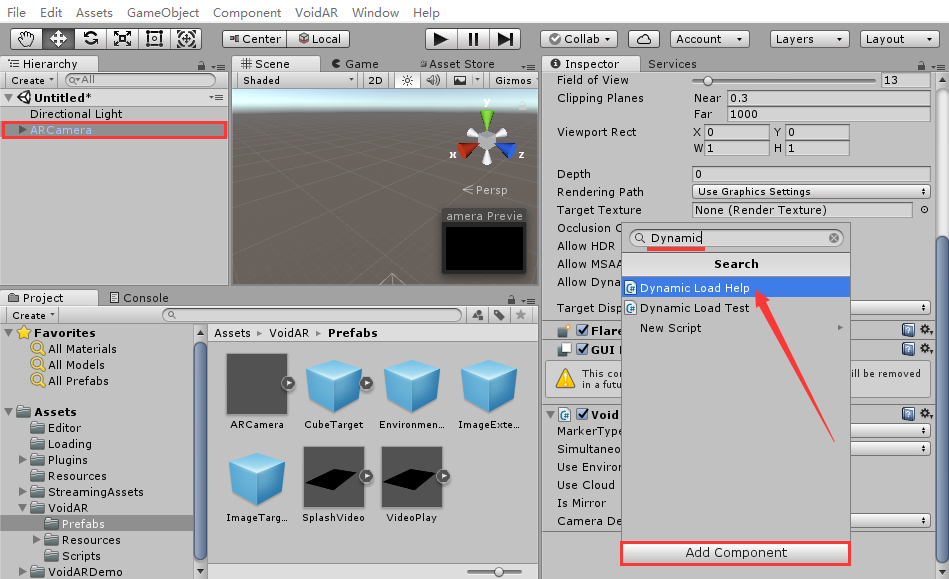
After binding, it shows as below:

Important
Dynamic Load Module enables users to perform some operation dynamically in runtime. These operation includes: create the ImageTarget(Marker) , create the model, adjust the position and the size of the model, bind the Marker and the model, create the UI interface.
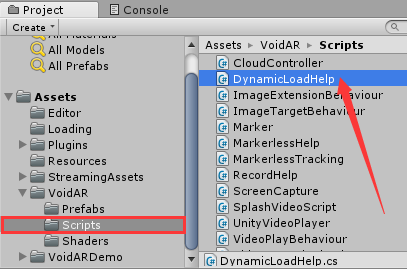
You can expand the directory [ Assets ] -> [ VoidAR ] -> [ Scripts ] and open "DynamicLoadHelp" to view the code, we will not introduce more details here.
Step 7. Save Scene
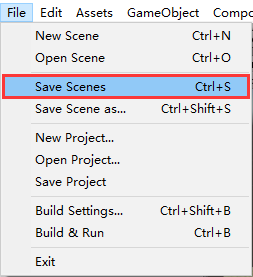
Select [ File] -> [ Save Scenes ] , click for saving your setup.
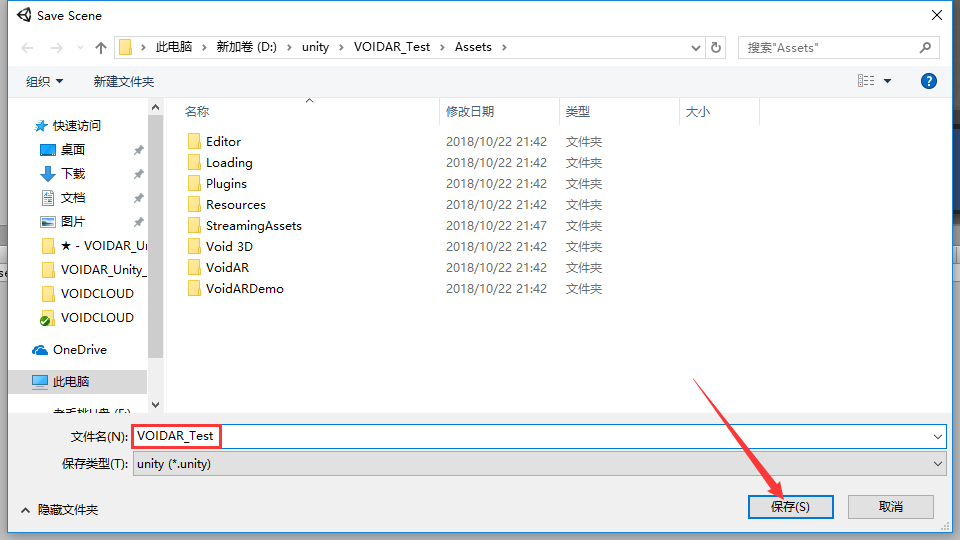
Setup the name as “VOIDAR_Test”, and click [ save ] button.
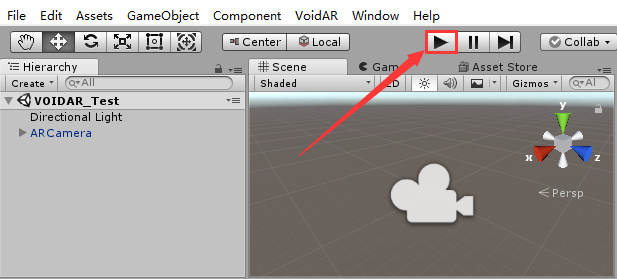
Step 8. Debug
Warning
Make sure your PC is connected with a camera.
Click [ Play ] button.
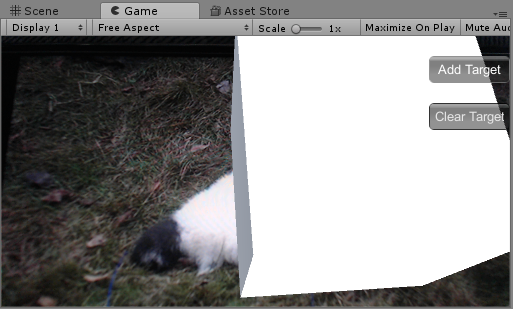
While running, click the button “Add Target” (drawn by OnGUI function in code) and face the camera to the marker, the model will appear soon.
Click the button “Clear Target”, the added model will be removed.
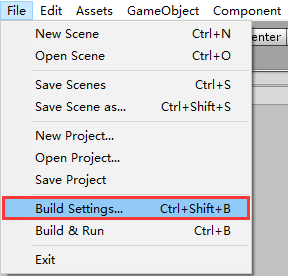
Step 9. Publishing Builds
Build Process includes Android, iOS, and Windows exe.
Android
First, switch the PC platform to Android platform from [ File ] -> [ Build Settings... ].
Select Android tag, if the [ Switch Platform ] button is grey, you need to download the Unity Android Support. Please click on the right side of the [ Open Download Page ] button, download and install.
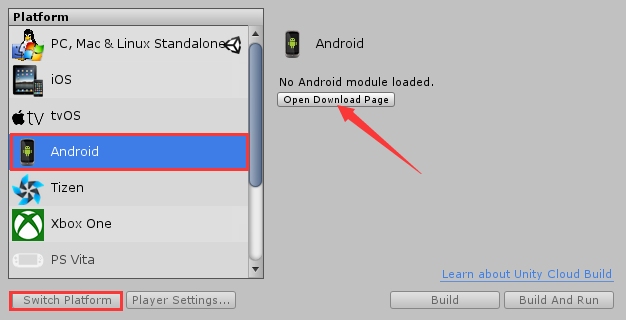
Click [ Switch Platform ] button, switch the platform to Android.
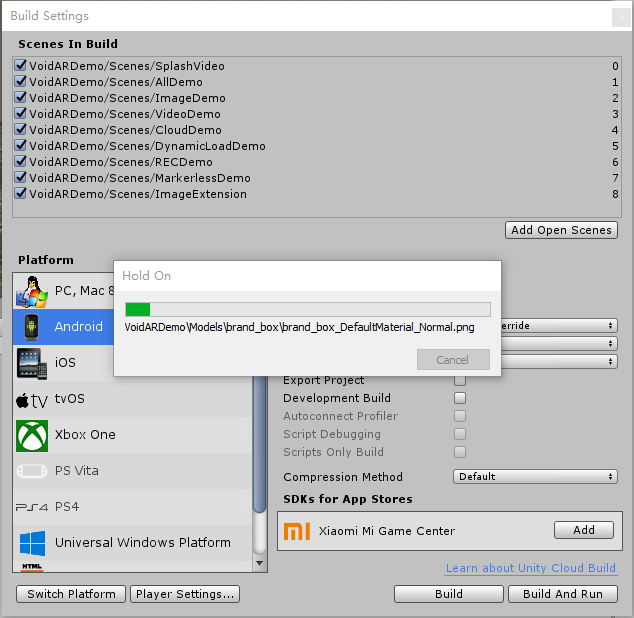
After switch process, close the Build Settings interface first, and continue with packing.
Select [ Edit ] -> [ Preferences... ], setup the preferences parameters.
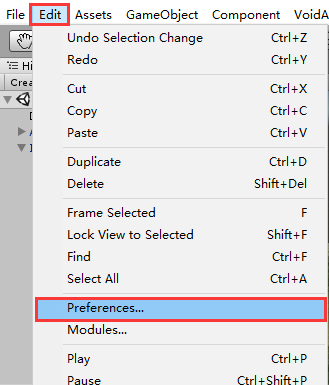
Select “External Tools” option, setup Android SDK and JDK。
Note
If you do not have SDK and JDK, please click [ Download ] from the interface, it will guide you to download from the prompted website.
Or you can also download from links below:
SDK: https://developer.android.com/studio/index.html
JDK: https://www.oracle.com/technetwork/java/javase/downloads/jdk8-downloads-2133151.html
After the installation of SDK and JDK, you are able to setup their directory.

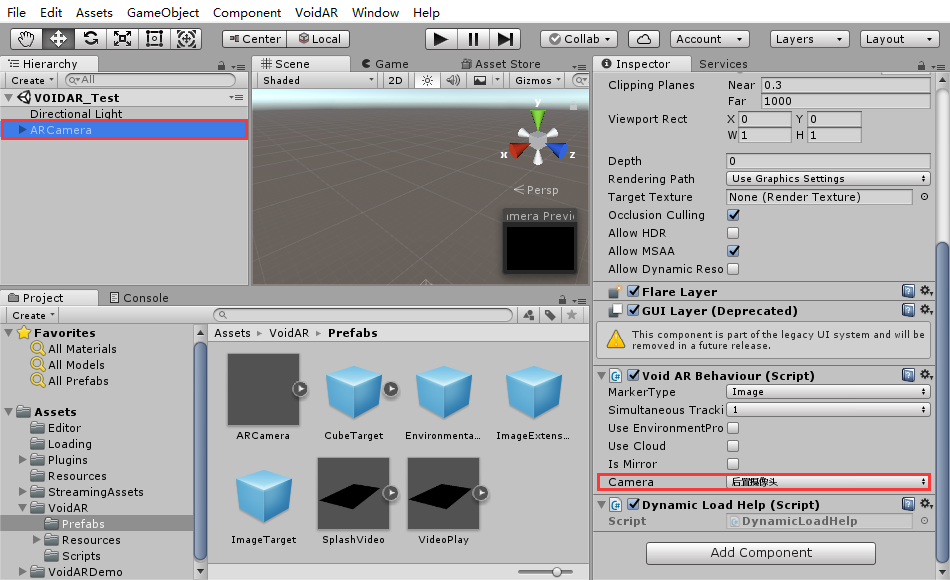
Select ARCamera, and look up in the “Inspector” area on the right side, setup “Void AR Behaviour (Script)” properties.
Set Camera= "后置摄像头"(Rear camera)
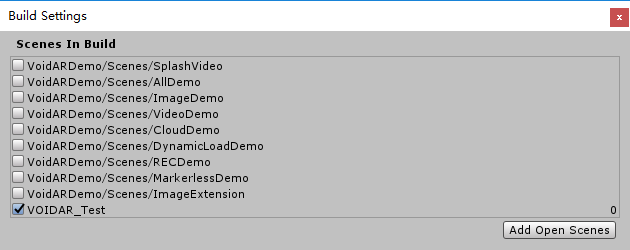
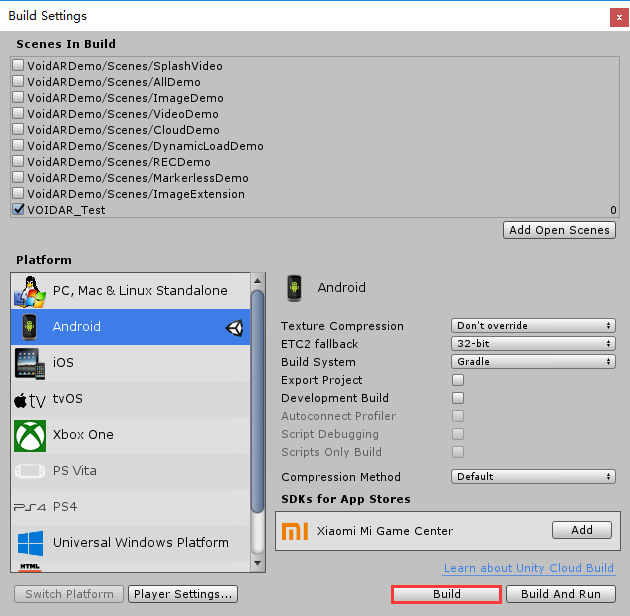
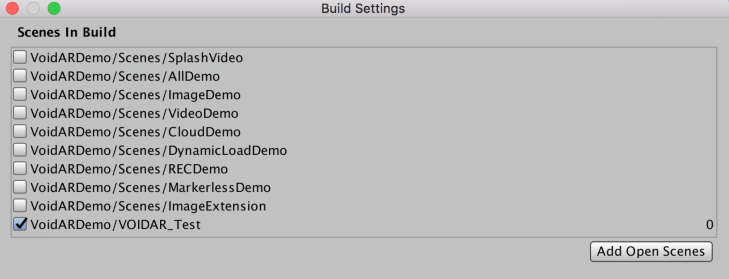
Select [ File ] -> [ Build Settings... ], cancel all default scenes, and click [ Add Open Scenes ] button to add current scene into the build area.

It shows as below:
Setup parameters
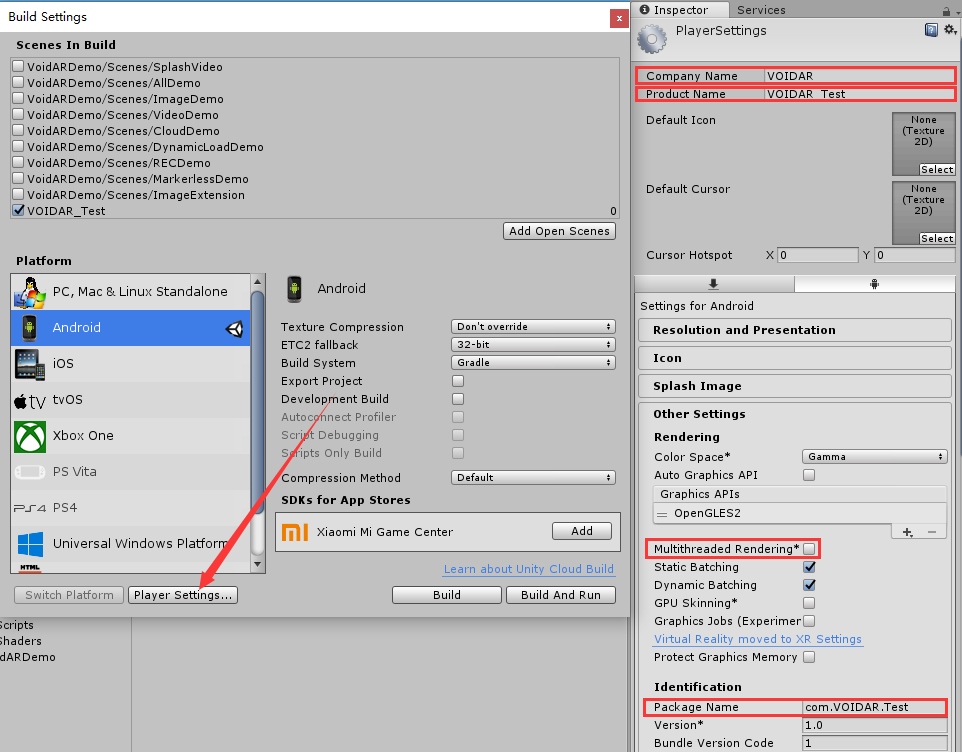
Click [ Player Settings... ] button, check the “Inspector” area, setup the parameters as below or as your needs.
Set Company= "VOIDAR"Set Product Name= "VOIDAR_Test"Set Bundle Identifier= "com.VOIDAR.Test"( Cannot use default value, otherwise it fail to build. )-
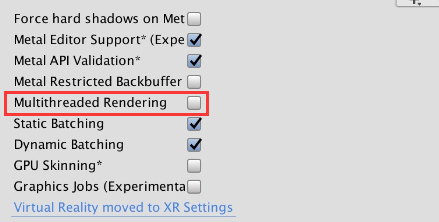
Important
Cancel the selection of “Multithreaded Rendering” !
Finish the settings, and click [ Build ] button.
Set the file name as “VOIDAR_Test”, and click [ save ] button to start building.
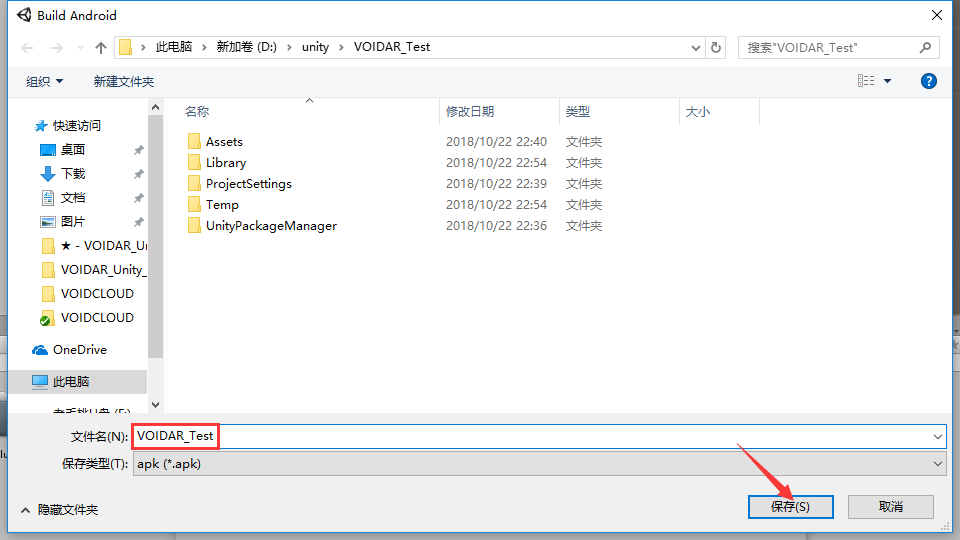
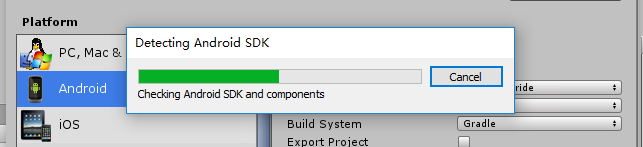
It takes minutes while building, please wait...
When the build is done, it will generate an apk file “VOIDAR_Test.apk”.
Android Build is completed.
iOS
iOS Build requires Mac device ( such as MacBook Pro、MacBook、iMac、Mac mini etc. )
Switch the platform to iOS platform in Unity, and build Xcode project.
Warning
It is recommended to use Mac device to build Xcode project. If previously you make the project in Windows environment, you can export the Unity project as a unitypackage, or copy it to Mac device and build for xcode project.
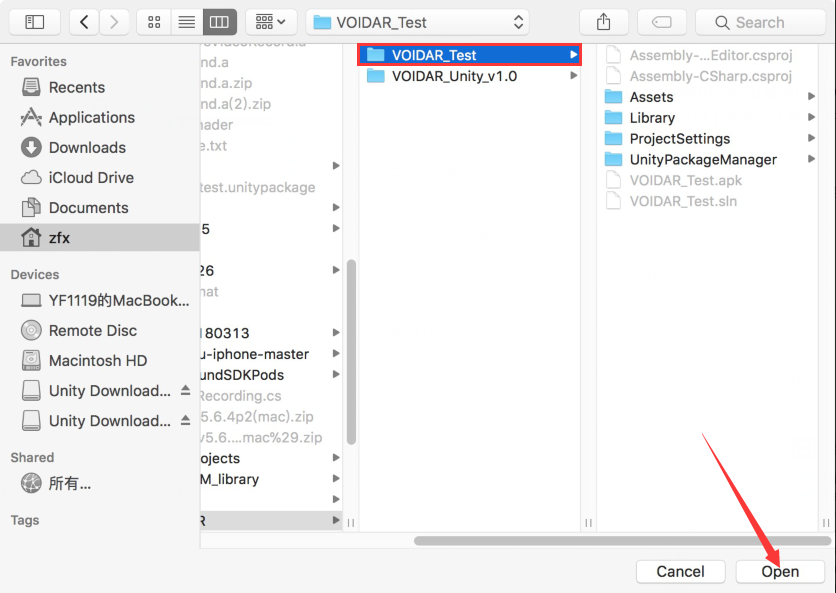
Launch Unity and open the saved or copied VOIDAR_Test project. ( Skip this step if project opened already )

Click [ Open ] button to open the project.
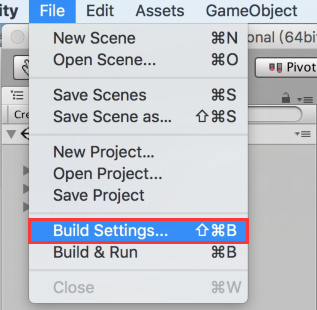
Switch to iOS platform in Unity, click [ File ] -> [ Build Settings... ].
Select iOS tag, if the [ Switch Platform ] button is grey, you need to download the Unity iOS Support. Please click on the right side of the [ Open Download Page ] button, download and install.
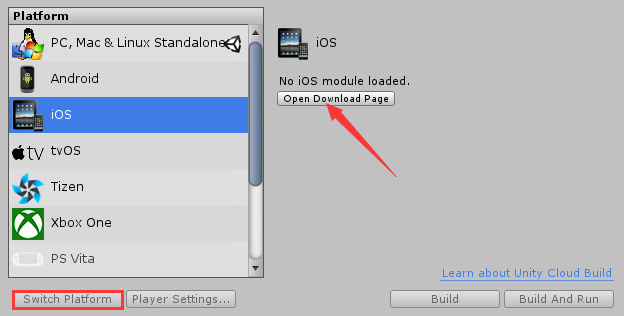
Click [ Switch Platform ] button, switch the platform to iOS.
Click [ Player Settings... ] button after switch.

Important
Cancel the selection of “Multithreaded Rendering”!
Close the Build Settings interface, select ARCamera, check the “Inspector” area on the right side, setup the "Void AR Behaviour (Script)” properties.
Set Camera= "后置摄像头"(Rear Camera)
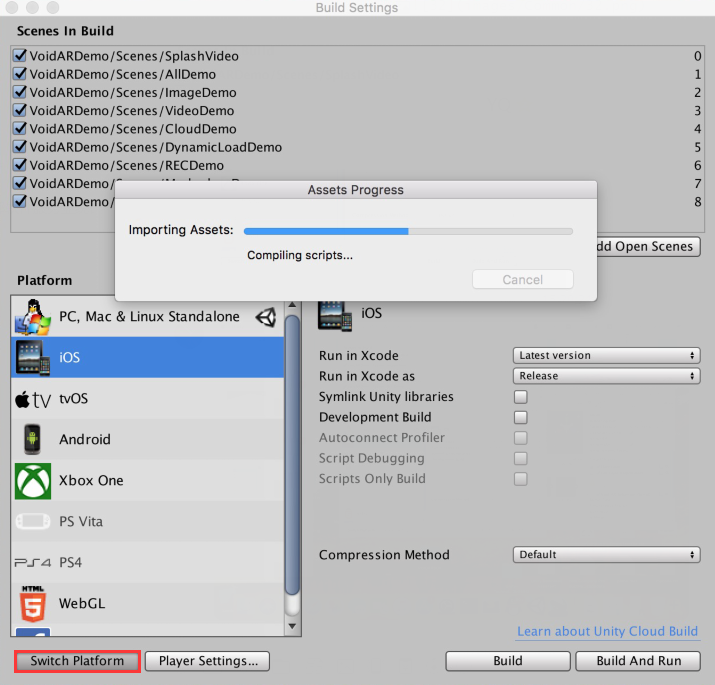
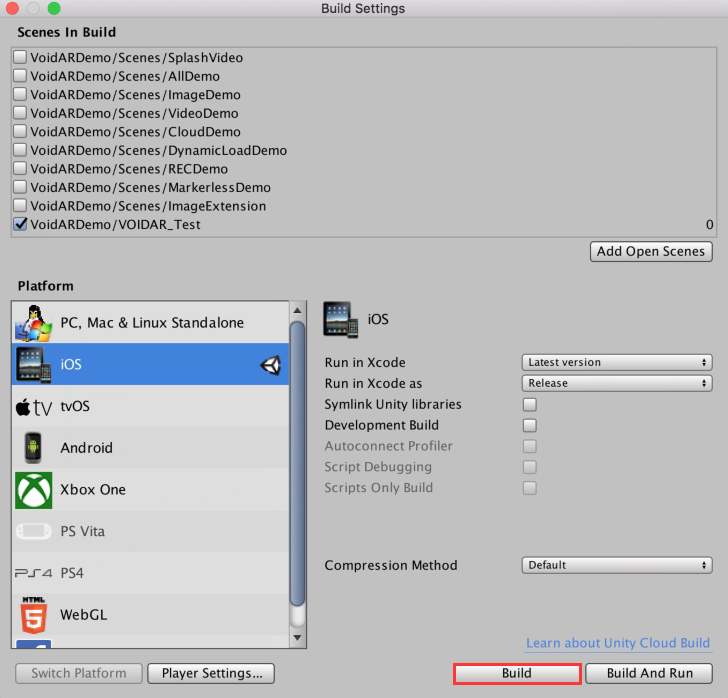
Select [ File ] -> [ Build Settings... ], cancel all default scenes, and click [ Add Open Scenes ] button to add current scene into the build area.
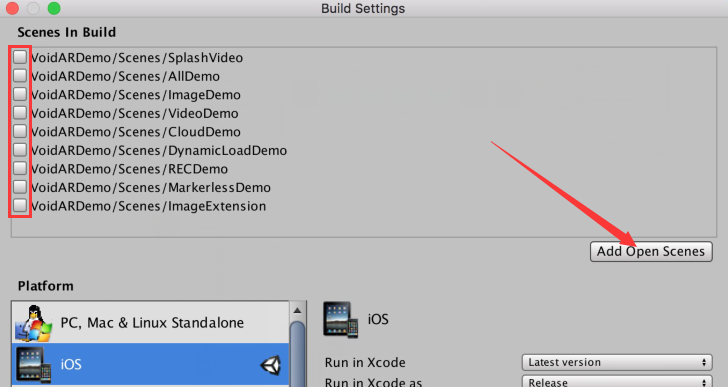
It shows as below:
Finish the settings, and click [ Build ] button.
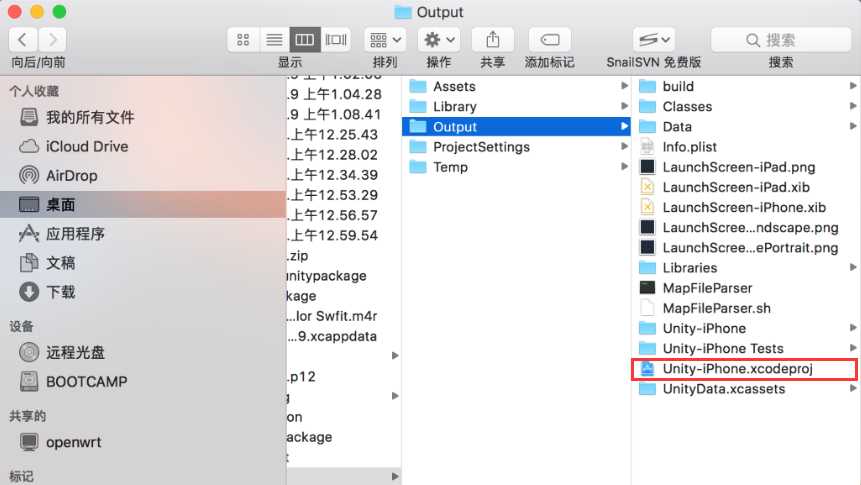
Set the project folder name “Output”, and click [ Save ].

Open the Xcode project.
Setup parameters
Filling in your configurations: your certificate, deployment target.
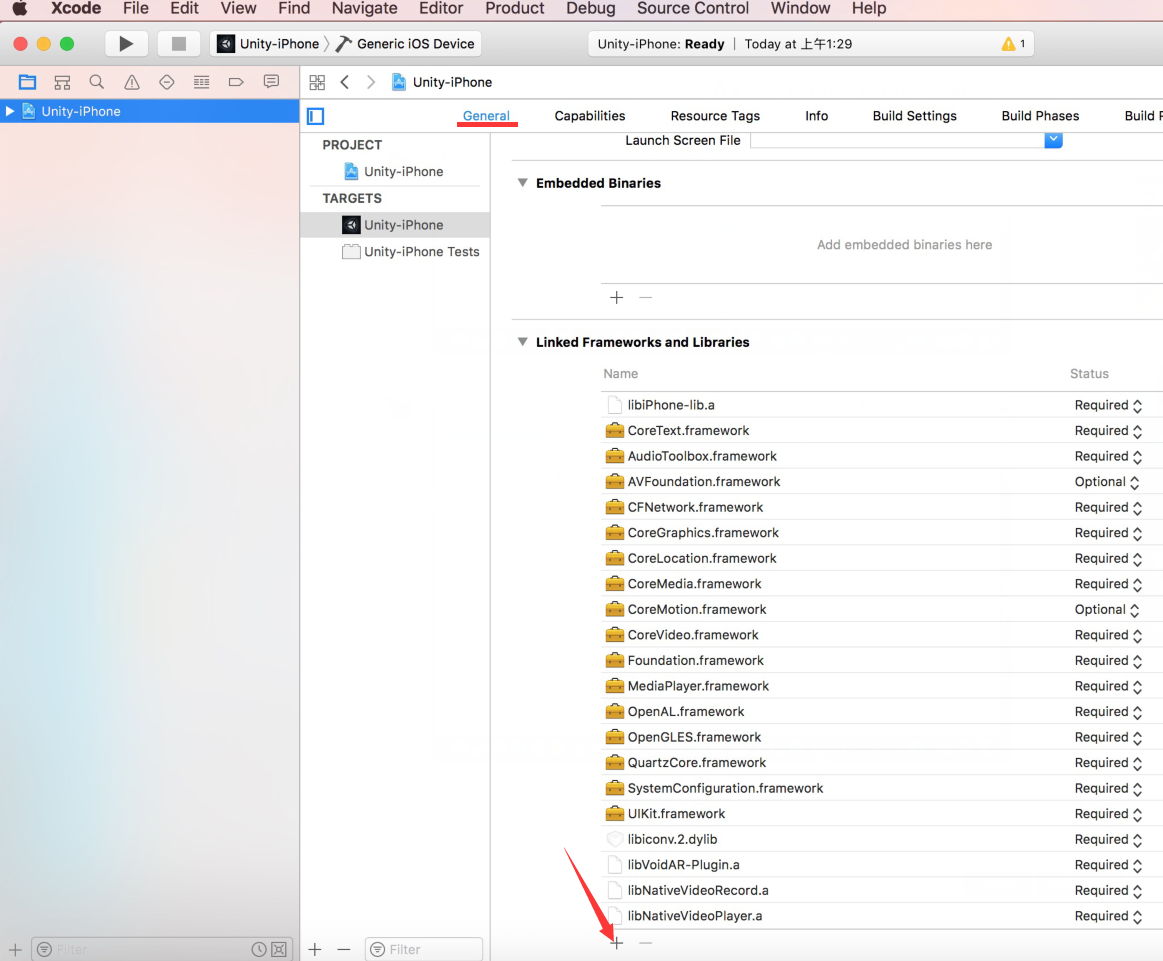
Click [ Unity-iPhone ] on the left side, config the parameters as below or by your customization:
Display Name= "VOIDAR_Test"Bundle Identifier= "com.VOIDAR.Demo"Version= "1.0"Build= “1.0”Team= “Your Certificate”Deployment Target= “8.1”

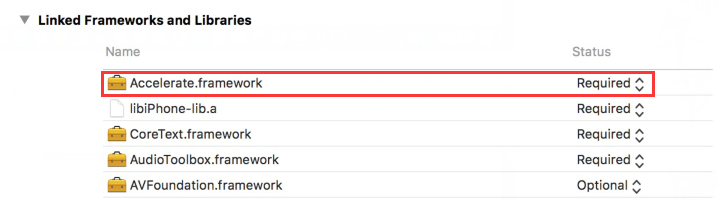
Add Accelerate.framework
Select General tag and scroll down, click the "+" in the "Linked Frameworks and Libraries".
Select “Accelerate.framework” from the prompted window, and click [ Add ].
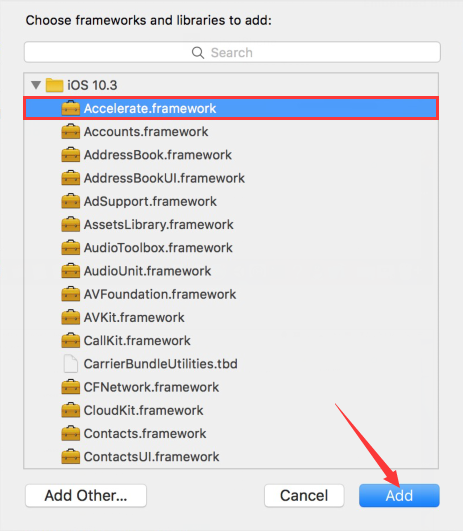
After doing that, you will see “Accelerate.framework” from the list of "Linked Frameworks and Libraries" as below:
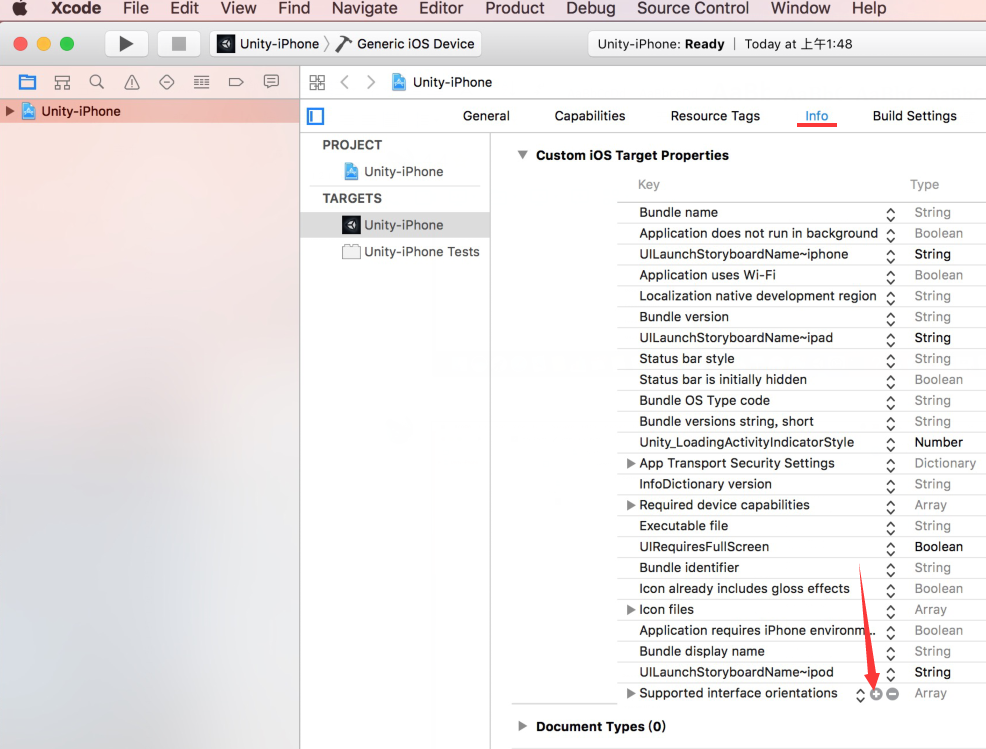
Add camera usage privacy
Select “Info” tag, click the "+" below the "Supported interface orientations". Select “Privacy - Camera Usage Description” in the prompting list.

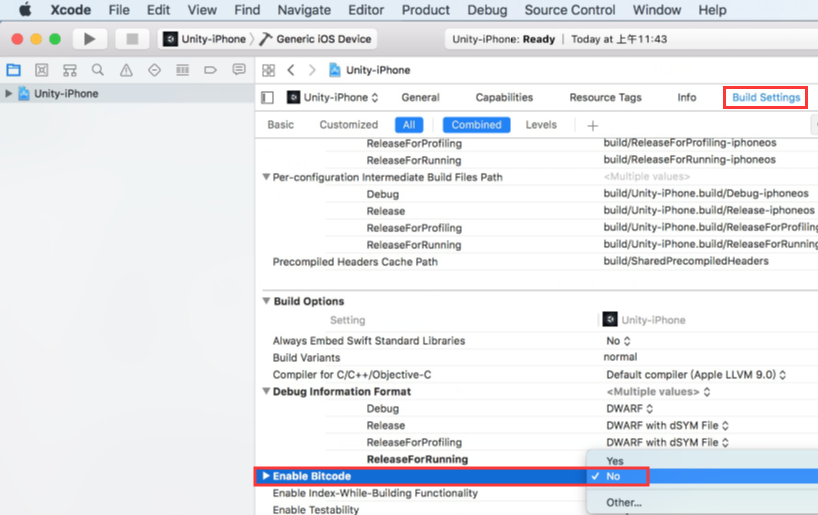
Set Enable Bitcode = “No”
Select ”Build Settings” tag, set Enable Bitcode = “No”.
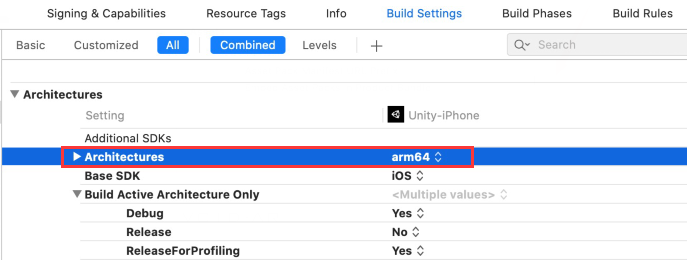
Cancel armv7
Select "Build Settings" tab, expand Architectures, and select "Other...".
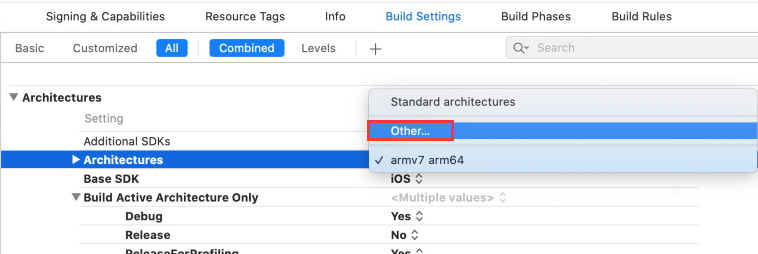
The pop-up interface, select "armv7" and click "-".

After canceling, the display is as below.
Connect iphone or ipad to the Mac device, Click [ Run ].
After building, there will be an application “VOIDAR_Test” built into your iphone or ipad.
The iOS build is done.
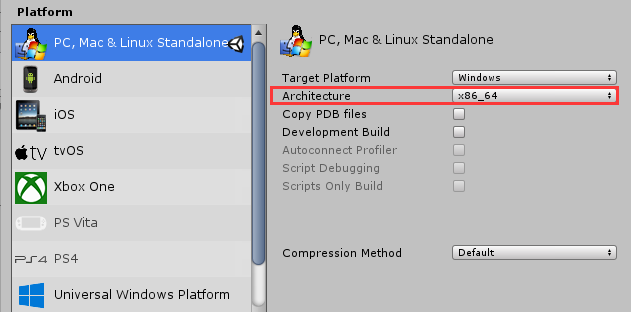
Windows exe
First, switch the platform to PC from [ File ] -> [ Build Settings... ].
Select PC tag, click [ Switch Platform ] button, switch the platform to PC.

Important
Set Architecture = "x86_64"
Warning
Make sure your PC is connected with a camera.
Select ARCamera, and look up in the “Inspector” area on the right side, setup “Void AR Behaviour (Script)” properties, and select camera.
Select [ File ] -> [ Build Settings... ], cancel all default scenes, and click [ Add Open Scenes ] button to add current scene into the build area.
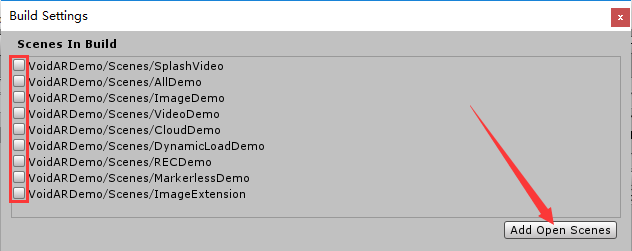
It shows as below:
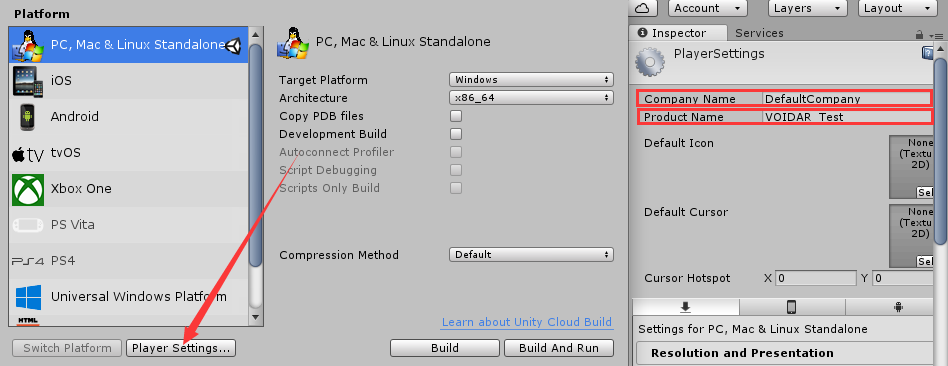
Setup parameters
Click [ Player Settings... ] button, check the “Inspector” area, setup the parameters as your needs.
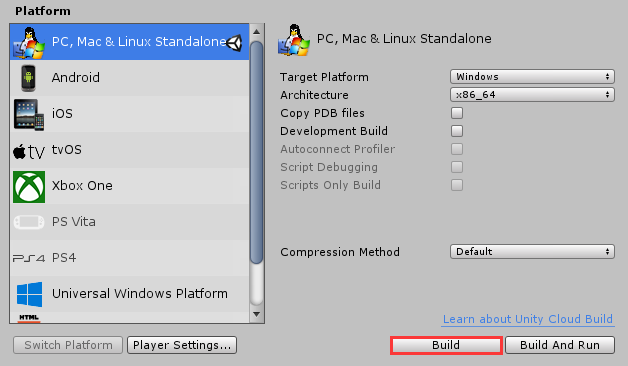
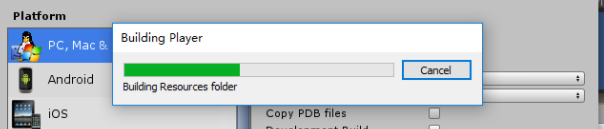
Finish the settings, and click [ Build ] button.
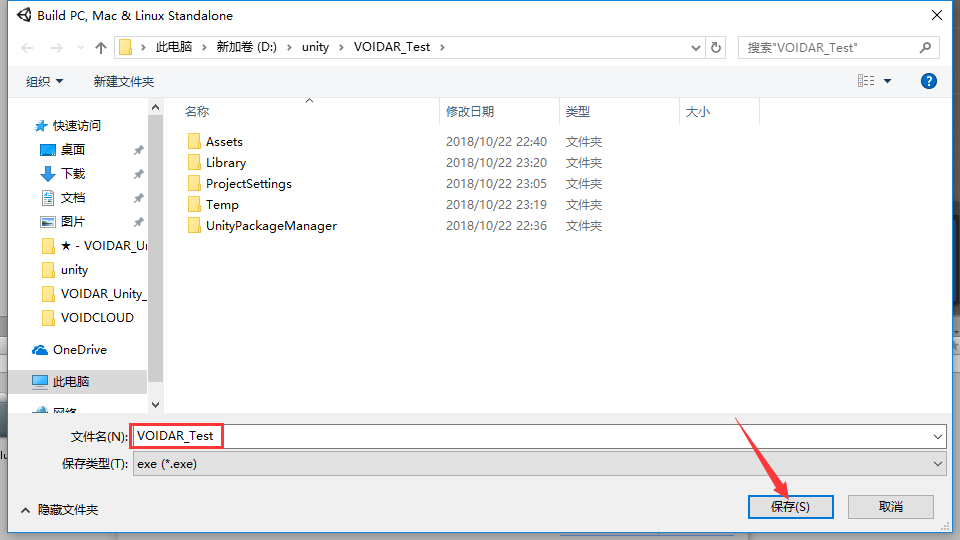
Set the file name as “VOIDAR_Test”, and click [ save ] button to start building.
Important
It will raise an error when running the exe if the filename has "Chinese characters" in it.
It takes minutes while building, please wait...
When the build is done, it will generate an exe file “VOIDAR_Test.exe”.
Windows exe build is completed.
By here, Dynamic Load process is done.