VOID CLOUD Private
Part 1. Introduction
VOID CLOUD Private is a Cloud Recognition service that runs on private network.
VOID CLOUD Private enables users to deploy VOID CLOUD Recognition service, which includes VOID CLOUD ( Image Target Recognition ) and VOID CLOUD ( VideoPlayback ), on their private network. VOID CLOUD Private gives users the power to manage, control and maintain independently.
Part 2. Getting Started
Warning
This tutorial describes the necessary steps to deploy the server of VOID CLOUD Private and the differences in Unity setting.
So please make sure you already familiar with the Unity setting of VOID CLOUD ( Image Target Recognition ) and VOID CLOUD ( VideoPlayback ).
If you’re not familiar with those two features, we suggest you read VOID CLOUD ( Image Target Recognition ) and VOID CLOUD ( VideoPlayback ) before you get started.
Part 3. Development Environment
You need to install and prepare your development environment as below before you start.
< Server-Side >
VOIDAR_PrivateClouds
VOID CLOUD Private deployment package.
Download: VOIDAR_PrivateClouds_v1.0.zip (278.86 MB)
Server Requirements
1 application serverfor install the VOID CLOUD Private applicationsHardware Recommendations: CPU: 8-core, RAM: 16GB
1 database serverfor install mysql5.7Hardware Recommendations: CPU: 4-core, RAM: 16GB
1 cache serverfor install redis2.8Hardware Recommendations: CPU: 2-core, RAM: 4GB
Server OS
Ubuntu Server 16.04.4 LTS
Related Software
- MySQL 5.7
- Redis 2.8
< Client-Side >
OS
- Windows 7 or higher
- OS X 10.10 or higher
Unity Version Support
| Unity3D Version | VOID AR SDK Full Features |
|---|---|
| 5.6.x | Support All Features |
| 2017.x | Support All Features |
| 2018.x | Support All Features |
| 2019.1.x | Support All Features |
| 2019.2.0 | Support All Features |
Note
Unity3D of this tutorial: Unity 2017.4.13
Unity3D Download: https://unity3d.com/cn/get-unity/download/archive
Part 4. Server Deployment
Step 1. Install System
Install Ubuntu Server 16.04.4 LTS
Step 2. Add new user and login
Add new user: voidar
useradd -r -m -s /bin/bash voidarSet Password
passwd voidar
Grant Root Privilege
vi /etc/sudoersAdd
voidar ALL=(ALL:ALL) ALLbelowroot ALL=(ALL:ALL) ALL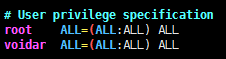
Step 3. Install jdk1.8 and set PATH in java
Install
Copy
jdk-8u181-linux-x64.tar.gzto/home/voidar/from deployment package.tar -zxvf jdk-8u181-linux-x64.tar.gz sudo cp -rf jdk1.8.0_181 /usr/local/Set PATH
sudo vi /etc/profileAdd the following code to the last line:export JAVA_HOME=/usr/local/jdk1.8.0_181
export PATH=$JAVA_HOME/bin:$PATH
export CLASSPATH=.:$JAVA_HOME/lib/dt.jar:$JAVA_HOME/lib/tools.jar

Bring the configuration into effect
source /etc/profile
Step 4. Install mysql 5.7 and redis 2.8, then launch both
Step 5. Install VOID AR toolkit
Copy libVoidarUtil.so to /home/voidar/ from deployment package.
sudo cp -rf libVoidarUtil.so /usr/local/lib/
sudo ldconfig
Step 6. Install resin and configure
Install
Copy
resin-4.0.58.tar.gzto/home/voidar/from deployment package.sudo apt-get install libssl-dev tar -zxvf resin-4.0.58.tar.gz cd /home/voidar/resin-4.0.58 mkdir libexec64 ./configure --enable-64bit --enable-jni --prefix=/home/voidar/resin-4.0.58 sudo make sudo make install sudo chmod 777 /home/voidar/resin-4.0.58/logConfigure
Copy
resin.propertiesto/home/voidar/from deployment package.cp –rf resin.properties /home/voidar/resin-4.0.58/conf/Note
If the server RAM is not 16GB, you need to set the jvm size based on your server RAM.
Step 7. Create database instance and execute script
Login mysql, create voidar_develop instance using utf-8 and execute script create.sql
mysql -h xxx -u xxx -pxxx voidar_develop < create.sql
Step 8. Deploy VOID CLOUD Private applications
Copy voidardevelop and voidarmodule to /home/voidar/resin-4.0.58/webapps from deployment package.
Add resource directory
mkdir /home/voidar/bundles
mkdir /home/voidar/images
mkdir /home/voidar/index
mkdir /home/voidar/logs
Modify voidardevelop
Go to directory
voidardevelop\WEB-INF\classesand modify configuration file:Modify
redis.properties, properly setting up redis.
Modify
jdbc.properties, properly setting up database.
Modify
BUNDLE_DOWNLOAD_URLandPROJECT_URLinsettings.xml, properly setting up the address. Modify the IP into your IP.Modify
EMAIL_ADDRESS、EMAIL_PORT、EMAIL_ACCOUNTandEMAIL_PASSWORDinsettings.xml, properly setting up the mail information.Modify voidarmodule
Go to directory
voidarmodule\WEB-INF\classesand modify configuration file;Modify
jdbc.properties, properly setting up database.
Step 9. Start and access resin
Start resin and access by http://IP:PORT/voidardevelop/loginp
You can login with the following account:
Account: admin@voidar.com
Password: 123456
Part 5. Differences in Unity setting
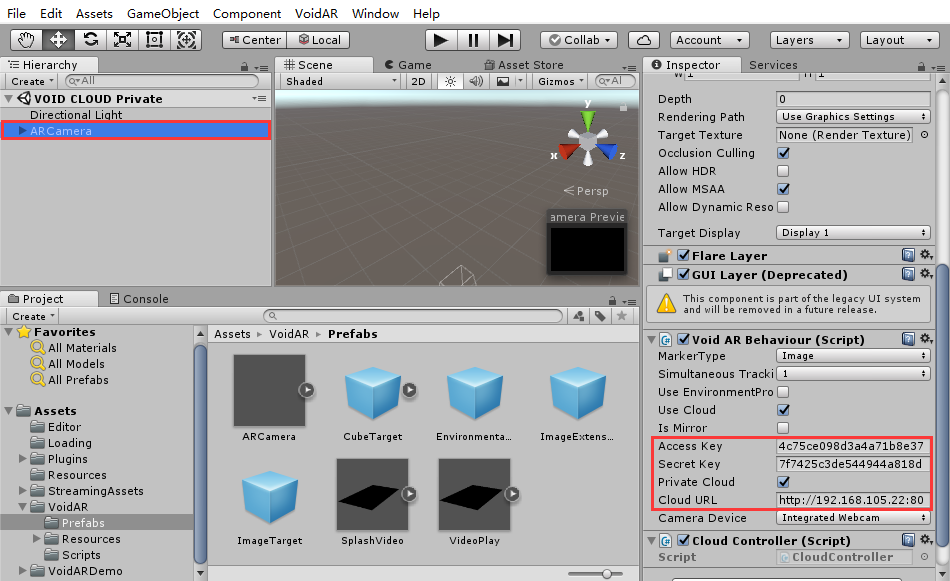
Select ARCamera in Unity project, and look up in the “Inspector” area on the right side, setup “Void AR Behaviour (Script)” properties.
Check “Private Cloud”Cloud URL: the address of private cloud serverAccessKey: your accessKey from your account in private cloud platformSecretKey: your secretKey from your account in private cloud platform
Other unity settings and tutorials please visit: "VOID CLOUD ( Image Target Recognition )", "VOID CLOUD ( VideoPlayback )"
By here, VOID CLOUD Private process is done.